

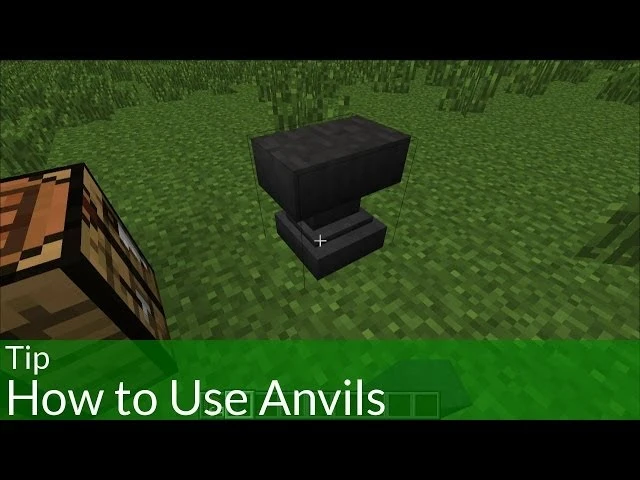
If you love Minecraft, you know how frustrating it is when your weapon breaks in a fight or your tool falls apart in a mine. Fear not, for the solution lies in knowing how to make an anvil in Minecraft! This guide will show you how to make an anvil and why it is so useful in different situations.
What is an Anvil in Minecraft

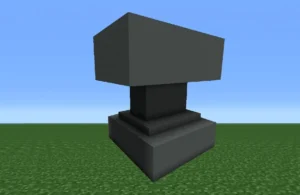
- Definition and Function
In Minecraft, an anvil is a vital utility block, serving as a crafting station to enhance and customize gear. Knowing how to make an anvil in Minecraft is crucial, enabling you to repair damaged items, rename equipment, and modify enchantments. If delving into enchantments, consider the anvil your trusty companion.
- Spawning Locations in Minecraft
Anvils naturally appear in woodland mansions, but crafting is a viable option, granting players control over gear enhancement. Whether discovered in a mansion or crafted in a cozy corner, the anvil’s utility is unparalleled.
- Crafting vs. Natural Spawning
The anvil’s beauty lies in versatility. While it naturally spawns, understanding how to make an anvil in Minecraft is straightforward. This flexibility ensures players, regardless of exploration preferences, can harness the anvil’s power—whether stumbled upon or meticulously crafted, it’s ready to perfect gear and face Minecraft’s challenges.
Items Required to Make an Anvil


A. Detailed List of Items Needed
Crafting an anvil in Minecraft requires a meticulous collection of resources. To embark on this crafting adventure, you’ll need the following items:
- 31 Iron Ingots: The backbone of the anvil recipe lies in the formidable iron. This crucial material forms the foundation for crafting an anvil.
- Crafting Table: The crafting table serves as the epicenter of your anvil creation. Ensure you have access to this crafting haven as you assemble the necessary components for your Minecraft anvil.
B. Iron Ingots and Blocks of Iron
To forge an anvil, you need a total of 31 Iron Ingots. You will use 27 of these to create three solid Blocks of Iron, while the remaining 4 ingots will act as the base.
To obtain the required iron, follow these steps:
-
Mine for Iron: Venture into the caves or mountains to find Iron Ore. When mined with a stone pickaxe or better, it will drop Raw Iron.
-
Smelt into Ingots: Place your Raw Iron into a Furnace or Blast Furnace with fuel (like coal or wood) to smelt it into Iron Ingots.
-
Craft Iron Blocks: An anvil requires three heavy blocks. Open your crafting table and fill all nine slots of the 3×3 grid with Iron Ingots to create one Block of Iron. Repeat this until you have three blocks.
Summary Checklist:
3 Blocks of Iron (Costs 27 Ingots)
4 Iron Ingots (Used for the base)
Total: 31 Iron Ingots
C. Crafting Table Requirement
Ensure you have a crafting table accessible during your crafting process. If you don’t have one, craft it using wooden planks. This table will serve as the workspace where you assemble the carefully collected iron ingots and blocks into the formidable anvil.
With these items in hand and the crafting table at your disposal, including the crafting table crafted using wooden planks, you’re ready to forge this indispensable utility block and enhance your Minecraft experience.
Crafting an Anvil
A. Step-by-Step Crafting Process
Crafting an anvil in Minecraft is a sequential process that involves several key steps. Follow this step-by-step guide to understand how to make an anvil in Minecraft:
1. Collecting Iron Ore
Your journey begins with mining iron ore. Explore the depths of Minecraft, and with a trusty pickaxe in hand, mine iron ore blocks scattered throughout the underground terrain.
2. Smelting Raw Iron
Once you’ve amassed a sufficient amount of iron ore, head to a furnace and smelt the Raw Iron in the furnace to transform it into Iron Ingots. This crucial step is the foundation for creating the sturdy structure of your anvil.
3. Crafting Iron Blocks
Now, gather a total of 31 iron ingots. Take 27 of these ingots and arrange them on a crafting table in a 3×3 pattern to create three blocks of iron. These blocks will serve as the building blocks for your anvil.
4. Assembling the Anvil
Once you have your three Iron Blocks and four Iron Ingots, open your Crafting Table. The arrangement in the 3×3 grid must be exact:
-
Top Row: Place the three Iron Blocks across all three slots.
-
Middle Row: Place a single Iron Ingot in the center slot (leave the left and right slots empty).
-
Bottom Row: Place the remaining three Iron Ingots across all three slots.
Voila! You’ve successfully forged your anvil. Simply click the icon in the result slot to move it into your inventory. This heavy-duty block is now ready to be placed on the ground and put to work.
Uses of an Anvil in Minecraft
The anvil in Minecraft is a powerhouse of utility. Here’s a concise rundown of its impactful uses:
A. Repairing Items
Revive worn-out gear by placing it on the anvil with a corresponding material ingot or by combining two damaged items.
B. Renaming Items
Personalize items effortlessly by using the anvil to give them unique names, promoting organization in your inventory.
C. Modifying Enchantments
Modify enchantments without losing them by combining enchanted books with tools on the anvil, ensuring a strategic upgrade.
D. Crafting Enchanted Books
Create powerful enchanted books by combining them with tools on the anvil, enhancing your gear for the challenges ahead.
E. Weapon Use and Gravity Impact
Utilize the anvil’s gravity-bound nature as a weapon by strategically placing it to deal damage to entities below.
F. Renaming and Map Functionality
In the Minecraft Bedrock Edition, the anvil has a specific history with maps. While the Cartography Table is now the primary tool for zooming out or cloning maps, the anvil remains essential for:
-
Renaming Maps: Anvils allow you to give your maps custom names (like “Base Alpha” or “Stronghold Path”). This is vital for staying organized when you have a large collection of maps in your storage.
-
The Legacy Method: While the Cartography Table is cheaper, you can still use the anvil to combine a map with paper to increase its size. However, keep in mind that this costs significantly more Experience Levels than using a Cartography Table.
How to Use an Anvil in Minecraft

Unlocking the potential of the anvil in Minecraft is key to enhancing your gameplay. Here’s a concise guide on its versatile uses:
A. Making Name Tags
Use the anvil to effortlessly rename items, adding a personal touch. It goes beyond labels—create Easter eggs, like the “Dinnerbone” effect, turning mobs upside down.
B. Repairing Items with the Anvil
Repair damaged tools seamlessly by placing them on the anvil with the corresponding material ingot or by combining two damaged items. Preserve enchantments, ensuring your gear remains potent.
C. Enchanting Items Through the Anvil
Combine enchanted books with tools on the anvil to strategically enhance gear. Customize your tools for specific tasks, making them more versatile.
D. Utilizing Falling Anvils as a Game Mechanic
The anvil is one of the few blocks in Minecraft affected by gravity. While this makes it a unique building component, it also doubles as a devastating (and stylish) weapon.
-
Gravity Damage: If an anvil falls from a height, it deals significant damage to any mob or player it hits. The higher it falls from, the more damage it does.
-
The Trap Mechanic: Players often use pistons or pressure plates to trigger “Anvil Traps” in bases to defend against intruders.
-
Durability Warning: Be careful! Anvils aren’t indestructible. Every time an anvil falls and lands, there is a 12% chance it will degrade. It will transition from “Anvil” to Chipped Anvil, then Damaged Anvil, and finally break into nothing. Using your anvil as a weapon is effective, but it will eventually cost you 31 iron ingots to replace it!
Read also: Retro Bowl Unblocked Games 76: Best Strategies to Win Every Game
Anvil vs. Grindstone (Quick Comparison)
| Feature | Anvil ✅ | Grindstone ❌ |
|---|---|---|
| Repair items | Yes | Yes |
| Keep enchantments | Yes | No |
| Rename items | Yes | No |
| Combine enchantments | Yes | No |
👉 Verdict: The Anvil is far superior for enchanted gear.
Frequently Asked Questions
Unlock the nuances of Minecraft anvils with these concise answers:
A. Comparison with Grindstone
Q: Anvil or grindstone?
A: Anvil is superior; it performs all grindstone actions without losing enchantments, making it the go-to for gear enhancement.
B. Lifespan of Minecraft Anvils
Q: How long do anvils last?
A: About 25 uses on average. Watch for durability, especially when using falling anvils.
C. Preventing “Too Expensive” Limitations
Q: How do I avoid the “Too Expensive” error on my anvil?
A: This message appears when the Experience cost to work on an item exceeds 39 levels. To avoid hitting this cap in Survival, use these pro strategies:
-
Prioritize Mending: Apply the Mending enchantment book to your gear. This allows your tools to repair themselves using XP orbs you pick up, completely bypassing the need for manual anvil repairs.
-
The “Pyramid” Method: Don’t add enchantment books one by one. Instead, combine two books together first, then add that combined book to your tool. This reduces the “prior work penalty” that causes costs to skyrocket.
-
The Grindstone Reset: If an item is already “Too Expensive,” you can put it through a Grindstone. This removes all enchantments and resets the work penalty to zero, allowing you to start enchanting the item from scratch.
Conclusion
In summary, the Minecraft anvil is a game-changer for gear management. From renaming your favorite sword to strategically using falling anvils to defend your base, its diverse functionalities make it a top-tier utility block. Most importantly, its unique ability to preserve and combine enchantments ensures that your gear remains powerful enough to face any challenge the Minecraft world throws at you.
Pro-Level Tips for Anvil Success:
-
Master the “Pyramid” Method: To keep enchantment costs low, combine books with other books before applying them to your gear. This avoids the “Too Expensive!” error.
-
Invest in Mending: Once you apply a Mending enchantment, you’ll rarely need to use your anvil for repairs, saving you both iron and experience levels.
-
Monitor Durability: Anvils degrade over time. Keep an eye on the texture; once it becomes a “Damaged Anvil,” it’s time to start smelting iron for a replacement.
-
Strategic Traps: Use the anvil’s gravity to your advantage by placing them over high-traffic mob areas for high-damage defense.
An anvil is more than just a block of iron—it is your key to high-level play. By following this guide and utilizing these survival-friendly strategies, you can maintain the ultimate set of gear. Have fun forging your path to victory!
Read more: Burrito Craft Game